Audio and Video Tag


Audio Tag
Since the release of html audios can be added to webpages using the 'audio' tag. The 'audio' tag is an line element that is used to embed sound files into a web page. It is useful tag if you want to add audio such as songs, interviews, etc. on your webpage.
Syntax:

<audio>
  <source src="sample.mp3" type="audio/mpeg">
</audio>
Attributes: The various attributes that can be used with the “audio” tag are listed below:
- Controls: Designates what controls to display with the audio player.
- Autoplay: Designates that the audio file will play immediately after it loads controls.
- Loop: Designates that the audio file should continuously repeat.
- src: Designates the URL of the audio file.
- muted: Designates that the audio file should be muted.
Supported Formats: Three formats mp3, ogg, wav are supported by HTML.
The below Examples explain the audio Tag:
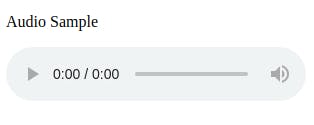
Example 1 (Adding audio to Webpage): The controls attribute is used to add audio controls such as play, pause, and volume.
<!DOCTYPE html>
<html>
<body>
<p>Audio Sample</p>

    <!-- audio tag starts here -->
    <audio controls>
        <source src="test.mp3" type="audio/mp3">
        <source src="test.ogg" type="audio/ogg">
    </audio>
    <!-- audio tag ends here -->
</body>
</html>
output
Video Tag
Since the release of html video can be added to webpages using the 'video' tag. Before HTML came into existence, videos could only be played in a browser using a plugin like flash. But after the release of HTML 5, adding a video to a webpage is as easy as adding an image. The HTML “video” element specifies a standard way to embed a video on a web page.
There are three different formats that are commonly supported by web browsers – mp4, Ogg, and WebM.
Syntax:
<video src="" controls> </video>
Attributes that can be used with the “video” tag are listed below :
- Autoplay: It tells the browser to immediately start downloading the video and play it as soon as it can.
Preload: It intends to provide a hint to the browser about what the author thinks will lead to the best user experience.
Loop: It tells the browser to automatically loop the video.
height: It sets the height of the video in CSS pixels.
width: It sets the width of the video in CSS pixels.
Controls: It shows the default video controls like play, pause, volume, etc.
Muted: It mutes the audio from the video.
Poster: It loads an image to preview before the loading of the video.
src: It is used to specify the URL of the video file
Example: This simple example the use of the tag in HTML. Here, the controls attribute is used to add controls like play, pause, volume, etc, & the “source” element is used to specify the video that the browser will choose to play.
!DOCTYPE html>
<html>
<body>
    <p>Adding Video on my webpage </p>

   <video width="400"
           height="350"
           controls>
        <source src="myvid.mp4"
                type="video/mp4">
        <source src="myvid.ogg"
                type="video/ogg">
    </video>
</body>
</html>
Output: